
Google Docs API Examples
Real world examples using the Google Doc's API. Screenshots of generated docs, code snippets, and explanation of quirks!
Google Docs API Examples (REST API v1)
Google’s API documentation can be dense. I’ve wrestled with their documentation many times to try and understand how to use their API’s. For this reason, I thought I’d create a resource to share with others with examples of Google’s Docs API in use. These examples are in Javascript using Google’s REST API. For reference, here’s the link to Google Docs official documentation . I intend for this to be a living resource. I plan to add to it as I come up across more examples.
Table of Contents
Advanced Text Style and Formatting
Authorizing Requests
Authorizing requests to the Google Doc’s API requires either an API key or an OAuth 2.0 token .
Create a Document
let fetch_url = `https://docs.googleapis.com/v1/documents?key=${API_KEY}`;

let fetch_options = {
  method: "POST",
  headers: {
    Authorization: `Bearer ${token}`,
    "Content-Type": "application/json",
  },
  body: JSON.stringify({
    title: "Example of a Doc created programmatically",
  }),
};

fetch(fetch_url, fetch_options)
  .then((res) => res.json())
  .then((res) => {
    console.log(res);
  });
Insert Text into a Document
const documentID = "ID_OF_DOCUMENT_YOU_ARE_ADDING_TO";

let fetch_url = `https://docs.googleapis.com/v1/documents/${documentID}:batchUpdate?key=${API_KEY}`;

let fetch_options = {
  method: "POST",
  headers: {
    Authorization: `Bearer ${token}`,
    "Content-Type": "application/json",
  },
  body: JSON.stringify({
    requests: [
      {
        insertText: {
          text: "test this out",
          location: {
            index: 1,
          },
        },
      },
    ],
  }),
};

fetch(fetch_url, fetch_options)
  .then((res) => res.json())
  .then((res) => {
    console.log(res);
  });
If you don’t know where to find the documentID, you can get it from taking res.documentId from the
Create a Document example
Formatting text
This section covers various different examples of formatting text
Inserting bolded text
This example will create a document, add text, and bold the text.
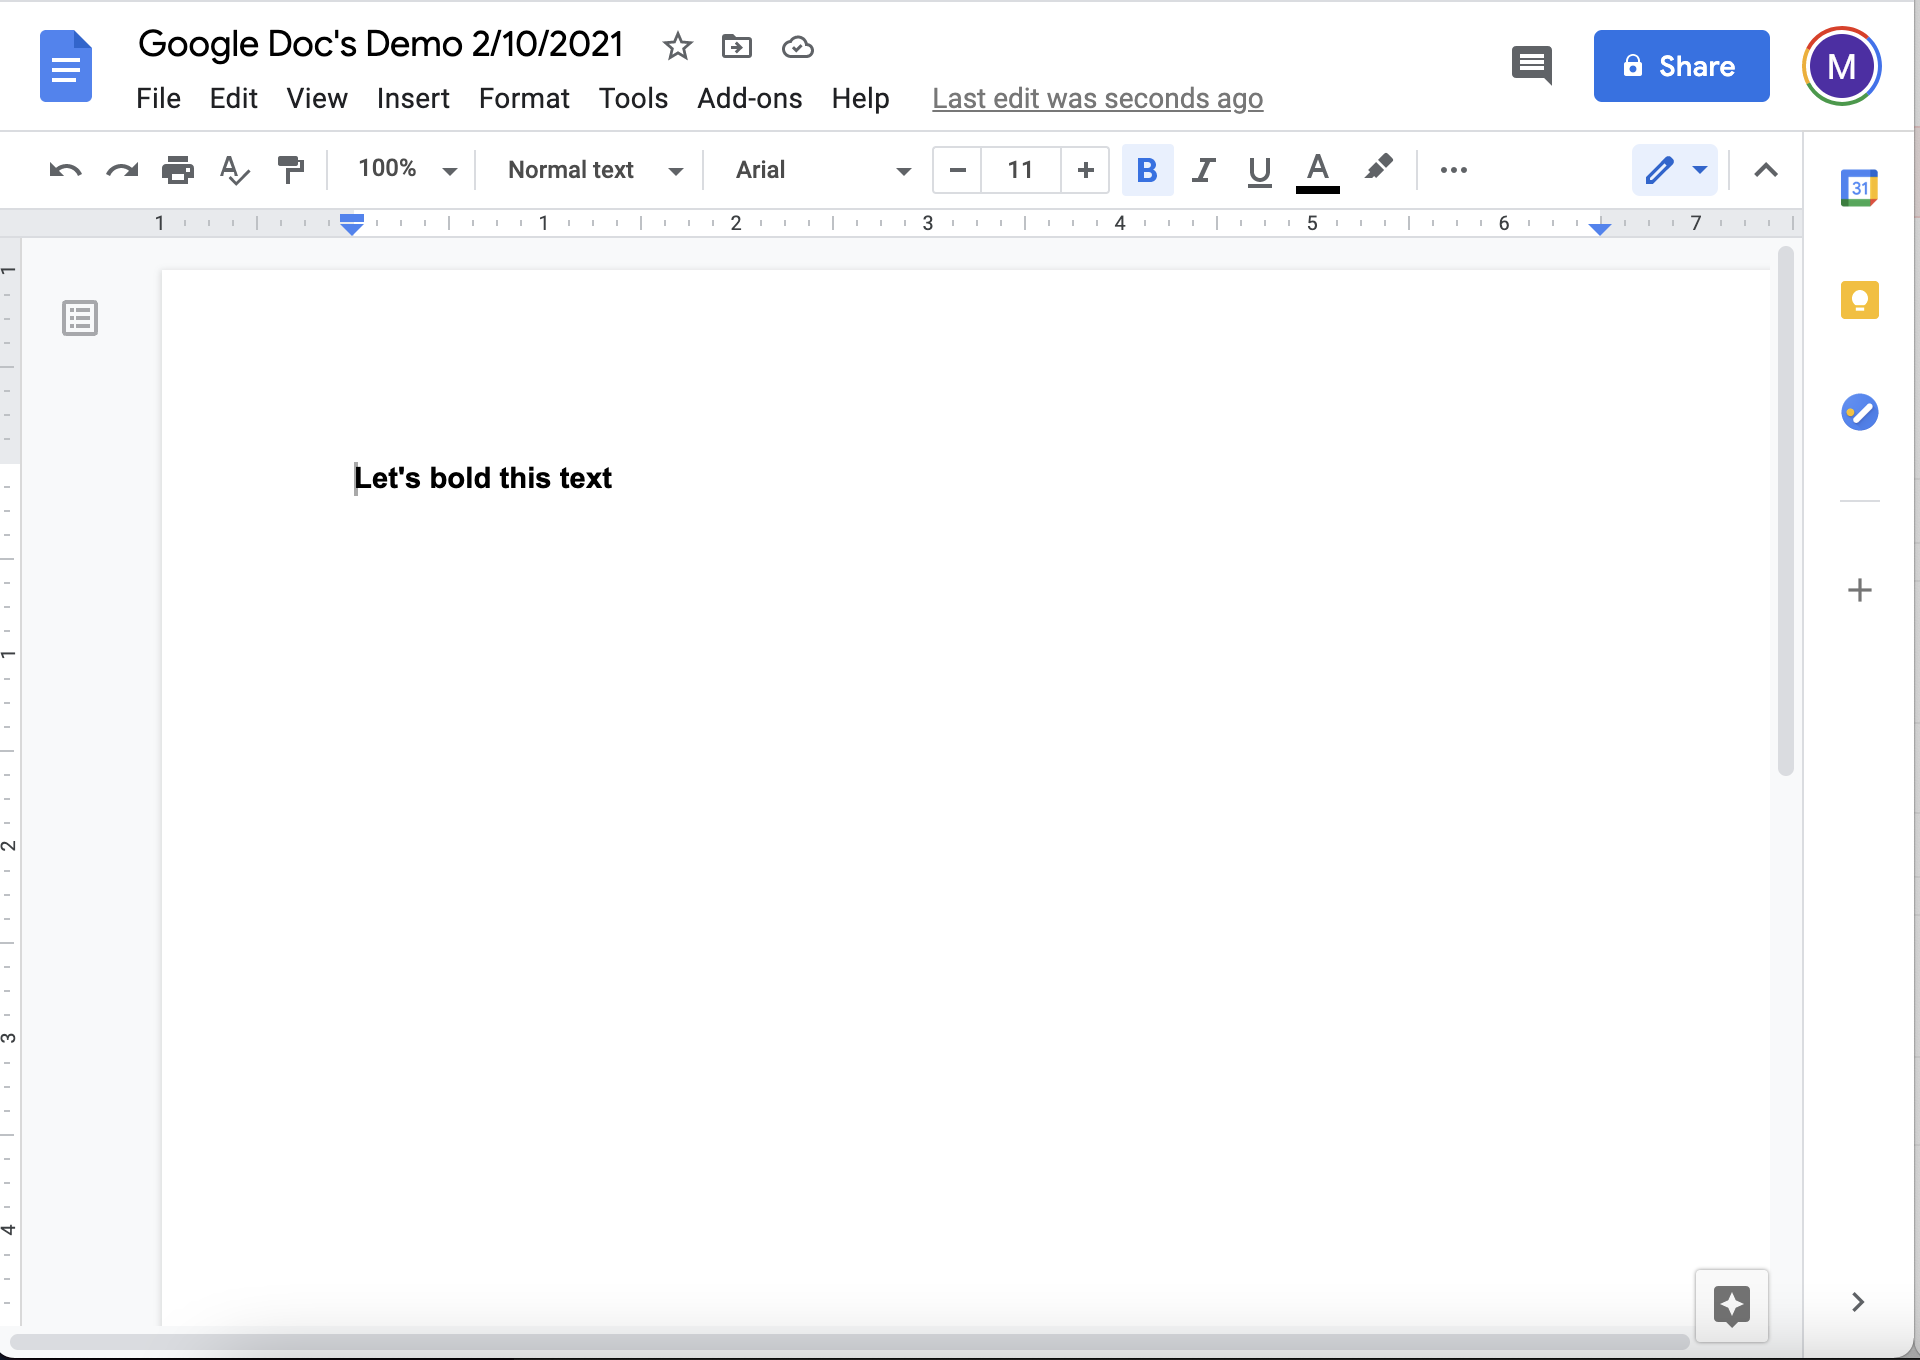
Here’s the code:
var dateObj = new Date();
var month = dateObj.getUTCMonth() + 1; //months from 1-12
var day = dateObj.getUTCDate();
var year = dateObj.getUTCFullYear();

const dateForTitle = month + "/" + day + "/" + year;
let fetch_options = {
  method: "POST",
  headers: {
    Authorization: `Bearer ${token}`,
    "Content-Type": "application/json",
  },
  body: JSON.stringify({
    title: `Google Doc's Demo ${dateForTitle}`,
  }),
};

fetch(fetch_url, fetch_options)
  .then((res) => res.json())
  .then((res) => {
    const documentID = res.documentId;

    let textForDoc = "Let's bold this text";

    requests = [
      {
        insertText: {
          text: textForDoc,
          location: {
            index: 1,
          },
        },
      },
      {
        updateTextStyle: {
          textStyle: {
            bold: true,
          },
          fields: "bold",
          range: {
            startIndex: 1,
            endIndex: textForDoc.length + 1,
          },
        },
      },
    ];

    let fetch_url = `https://docs.googleapis.com/v1/documents/${documentID}:batchUpdate?key=${API_KEY}`;

    let fetch_options = {
      method: "POST",
      headers: {
        Authorization: `Bearer ${token}`,
        "Content-Type": "application/json",
      },
      body: JSON.stringify({
        requests: requests,
      }),
    };

    fetch(fetch_url, fetch_options)
      .then((res) => res.json())
      .then((res) => {
        console.log(res);
      });
  });
Multiple lines with bold, italic, background color
Let’s tackle a more complicated example:

A note about adding content in reverse:
Google recommends building your document backwards. This way you don’t have to keep track of where in the document you are editing, you can just a location with index 1, which represents the top of the document.
From Google’s documentation:
Simplify matters by writing backwards. To avoid having to precalculate these offset changes, order your insertions to “write backwards”: do the insertion at the highest-numbered index first, working your way towards the beginning with each insertion. This ordering ensures that each write’s offsets are unaffected by the preceding ones.
The code:
let fetch_url = `https://docs.googleapis.com/v1/documents?key=${API_KEY}`;

let fetch_options = {
  method: "POST",
  headers: {
    Authorization: `Bearer ${token}`,
    "Content-Type": "application/json",
  },
  body: JSON.stringify({
    title: `Google Doc's multiple lines with bold, italic, background color`,
  }),
};

fetch(fetch_url, fetch_options)
  .then((res) => res.json())
  .then((res) => {
    const documentID = res.documentId;

    const linesOfTextToEnter = [
      "This is line one",
      "This is line two.  We'll highlight this line!",
      "This is line three",
    ];

    // We'll put all our requests in here
    let requests = [];

    // This reverses the array so we can build the document backwards.
    // See the note about adding content in reverse.
    linesOfTextToEnter
      .slice()
      .reverse()
      .forEach((lineOfText, index) => {
        boldedText = `${lineOfText}:\n`;

        italicText = "Example text!\n";
        let italicTextStyle = {
          bold: false,
          italic: true,
        };

        // Let's put a background color on the second element in the linesOfTextToEnter array
        if (index == 1) {
          italicTextStyle.backgroundColor = {
            color: {
              rgbColor: {
                red: 1.0,
                green: 1.0,
                blue: 0.8,
              },
            },
          };
        }

        requests = requests.concat([
          {
            insertText: {
              text: boldedText,
              location: {
                index: 1,
              },
            },
          },
          {
            updateTextStyle: {
              textStyle: {
                bold: true,
              },
              fields: "bold",
              range: {
                startIndex: 1,
                endIndex: boldedText.length,
              },
            },
          },
          {
            insertText: {
              text: italicText,
              location: {
                index: boldedText.length + 1,
              },
            },
          },
          {
            updateTextStyle: {
              textStyle: italicTextStyle,
              fields: "bold,italic,backgroundColor",
              range: {
                startIndex: boldedText.length + 1,
                endIndex: boldedText.length + italicText.length,
              },
            },
          },
        ]);
      });
    const docHeaderText = "Google Doc's Examples!\n\n";
    requests = requests.concat([
      {
        insertText: {
          text: docHeaderText,
          location: {
            index: 1,
          },
        },
      },
      {
        updateTextStyle: {
          textStyle: {
            bold: false,
            italic: false,
            fontSize: {
              magnitude: 17,
              unit: "PT",
            },
          },
          fields: "bold,italic,fontSize",
          range: {
            startIndex: 1,
            endIndex: docHeaderText.length,
          },
        },
      },
      {
        updateParagraphStyle: {
          range: {
            startIndex: 1,
            endIndex: docHeaderText.length,
          },
          paragraphStyle: {
            alignment: "CENTER",
          },
          fields: "alignment",
        },
      },
    ]);

    let fetch_url = `https://docs.googleapis.com/v1/documents/${documentID}:batchUpdate?key=${API_KEY}`;

    let fetch_options = {
      method: "POST",
      headers: {
        Authorization: `Bearer ${token}`,
        "Content-Type": "application/json",
      },
      body: JSON.stringify({
        requests: requests,
      }),
    };

    fetch(fetch_url, fetch_options)
      .then((res) => res.json())
      .then((res) => {
        console.log(res);
      });
  });
Working with Footnotes
Creating footnotes in a document is crucial for academic writing or detailed documentation. It provides readers with additional context or references without cluttering the main text. The Google Docs API facilitates the addition of footnotes programmatically, enhancing the automation of document creation and editing processes.
Creating a Footnote
Here’s how to create a footnote in a Google Doc using JavaScript:
const docId = "YOUR_DOCUMENT_ID";
const apiKey = "YOUR_API_KEY";
const accessToken = "YOUR_ACCESS_TOKEN";

let apiUrl = `https://docs.googleapis.com/v1/documents/${docId}:batchUpdate?key=${apiKey}`;

let requestBody = {
  requests: [
    {
      createFootnote: {
        location: {
          index: 25, // Position where the footnote will be inserted.
        },
      },
    },
    {
      insertText: {
        text: "This is the footnote text.",
        location: {
          index: 26, // Adjust this index according to where the footnote reference is created.
        },
      },
    },
  ],
};

fetch(apiUrl, {
  method: "POST",
  headers: {
    Authorization: `Bearer ${accessToken}`,
    "Content-Type": "application/json",
  },
  body: JSON.stringify(requestBody),
})
  .then((response) => response.json())
  .then((data) => console.log(data))
  .catch((error) => console.error("Error:", error));
This example demonstrates inserting a footnote at a specific location in your document and populating it with text. The location parameter specifies where the footnote reference will be inserted in the main document body. After creating the footnote, you can insert the desired text into it by adjusting the text insertion index to match the newly created footnote’s location.
Remember, the index values are critical for ensuring the footnote is inserted at the correct position within the document. The index for inserting the footnote text should immediately follow the index used to create the footnote reference.
Managing Headers and Footers
Adding, updating, and removing headers and footers in your documents can significantly improve the structure and readability of your content. Google Docs API provides a flexible way to programmatically manage these elements. This section covers how to create headers and footers, update them, and finally, how to remove them from your document.
Creating a Header
To add a header to your document, you need to specify the type of header and, optionally, the section where it should be applied. Here’s an example:
const documentId = 'YOUR_DOCUMENT_ID';
let requestOptions = {
  method: 'POST',
  headers: {
    Authorization: `Bearer ${YOUR_OAUTH2_TOKEN}`,
    'Content-Type': 'application/json',
  },
  body: JSON.stringify({
    requests: [
      {
        createHeader: {
          type: 'DEFAULT',
        },
      },
    ],
  }),
};

fetch(`https://docs.googleapis.com/v1/documents/${documentId}:batchUpdate`, requestOptions)
  .then(response => response.json())
  .then(result => console.log(result))
  .catch(error => console.log('error', error));
Updating Headers and Footers
Currently, direct API methods to update headers and footers by altering their content aren’t provided. Instead, you update the content within headers and footers by specifying their unique IDs obtained during creation or from the document’s structure. You can insert or delete text and apply formatting within these areas similar to how you manage the document’s body.
Deleting a Header or Footer
To remove a header or footer, you’ll use its ID. Here’s how to delete a header:
let requestOptions = {
  method: 'POST',
  headers: {
    Authorization: `Bearer ${YOUR_OAUTH2_TOKEN}`,
    'Content-Type': 'application/json',
  },
  body: JSON.stringify({
    requests: [
      {
        deleteHeader: {
          headerId: 'YOUR_HEADER_ID',
        },
      },
    ],
  }),
};

fetch(`https://docs.googleapis.com/v1/documents/${documentId}:batchUpdate`, requestOptions)
  .then(response => response.json())
  .then(result => console.log(result))
  .catch(error => console.log('error', error));
Remember, when you delete a header or footer, it’s removed from the entire document or the specific section it’s applied to, affecting the document’s layout. Always ensure you’re making these changes in a copy or draft document first to avoid unintended alterations to your original document.
Named Ranges
Named ranges are a powerful feature in the Google Docs API that allow you to reference specific parts of your document programmatically. This can be particularly useful for documents that are frequently updated or require dynamic content changes. Named ranges give you the ability to easily locate and manipulate sections of your document without having to keep track of specific indices.
Creating a Named Range
To create a named range, you can use the batchUpdate method with a createNamedRange request. Here’s an example of how to create a named range for a section of your document:
const documentId = 'YOUR_DOCUMENT_ID';
let fetchUrl = `https://docs.googleapis.com/v1/documents/${documentId}:batchUpdate?key=${API_KEY}`;

let fetchOptions = {
  method: "POST",
  headers: {
    Authorization: `Bearer ${token}`,
    "Content-Type": "application/json",
  },
  body: JSON.stringify({
    requests: [
      {
        createNamedRange: {
          name: "ExampleNamedRange",
          range: {
            startIndex: 100,
            endIndex: 200
          }
        }
      }
    ]
  }),
};

fetch(fetchUrl, fetchOptions)
  .then((res) => res.json())
  .then((res) => {
    console.log('Named Range created with ID:', res.replies[0].createNamedRange.namedRangeId);
  });
Deleting a Named Range
If you need to delete a named range, you can do so by specifying either the name of the range or its ID in a deleteNamedRange request:
let fetchOptions = {
  method: "POST",
  headers: {
    Authorization: `Bearer ${token}`,
    "Content-Type": "application/json",
  },
  body: JSON.stringify({
    requests: [
      {
        deleteNamedRange: {
          // Use either namedRangeId or name
          namedRangeId: "NAMED_RANGE_ID"
          // name: "ExampleNamedRange"
        }
      }
    ]
  }),
};

fetch(fetchUrl, fetchOptions)
  .then((res) => res.json())
  .then((res) => {
    console.log('Named Range deleted');
  });
Using named ranges can greatly simplify the process of updating your documents, especially for sections that are frequently modified or need to be easily accessible for updates.
Bullets and Numbering
Adding bullets and numbering programmatically is a powerful feature of the Google Docs API that can help format lists within a document. This functionality is especially useful for dynamically generated documents or reports that require structured data presentation. Here’s how to add bullets to a list of items in a document using the Google Docs API:
const documentId = 'YOUR_DOCUMENT_ID';
const requests = [
  {
    // Specify the range of text to apply bullets
    createParagraphBullets: {
      range: {
        startIndex: 1,
        endIndex: 50, // Adjust endIndex according to your text
      },
      bulletPreset: 'BULLET_DISC_CIRCLE_SQUARE', // Bullet style
    },
  },
];

const fetchOptions = {
  method: 'POST',
  headers: {
    Authorization: `Bearer ${YOUR_OAUTH2_TOKEN}`,
    'Content-Type': 'application/json',
  },
  body: JSON.stringify({requests}),
};

fetch(`https://docs.googleapis.com/v1/documents/${documentId}:batchUpdate`, fetchOptions)
  .then(response => response.json())
  .then(result => console.log(result))
  .catch(error => console.error('Error: ', error));
This example demonstrates how to add bullets to a specific range within a Google Doc. The createParagraphBullets request applies bullet formatting to the specified text range. You can customize the bullet style by changing the bulletPreset property. The Google Docs API supports various bullet styles, including BULLET_DISC_CIRCLE_SQUARE, which is a common choice for basic lists.
For removing bullets and numbering, you would use a similar approach but with a deleteParagraphBullets request, specifying the range of the text from which you want to remove the bullet formatting.
Remember, when working with ranges, startIndex is inclusive, and endIndex is exclusive. The indices are based on UTF-16 code unit counts, which means that special characters, such as emojis, might count as more than one unit.
Positioned Objects and Images
Incorporating images and positioned objects within a document can significantly enhance its readability and visual appeal. The Google Docs API allows for the insertion and manipulation of images in a document, enabling you to programmatically customize how visual elements appear. Here’s an example of how to insert an image into a document:
const documentId = 'YOUR_DOCUMENT_ID';
const requests = [
  {
    insertInlineImage: {
      location: {
        index: 28, // Position where the image should be inserted
      },
      uri: 'https://example.com/image.png', // URL of the image to insert
      objectSize: {
        height: {
          magnitude: 50,
          unit: 'PT'
        },
        width: {
          magnitude: 50,
          unit: 'PT'
        }
      }
    }
  }
];

const fetchOptions = {
  method: 'POST',
  headers: {
    Authorization: `Bearer ${YOUR_OAUTH2_TOKEN}`,
    'Content-Type': 'application/json',
  },
  body: JSON.stringify({requests}),
};

fetch(`https://docs.googleapis.com/v1/documents/${documentId}:batchUpdate`, fetchOptions)
  .then(response => response.json())
  .then(result => console.log(result))
  .catch(error => console.error('Error: ', error));
This script demonstrates adding an image at a specific location within your document. You can adjust the index to place the image exactly where you need it. The uri parameter should point to the publicly accessible URL of the image you wish to insert. Furthermore, you can specify the objectSize to scale the image to your desired dimensions.
For more advanced positioning, such as wrapping text around images or setting precise locations, you would work with PositionedObjects. These allow for more detailed layout options, ensuring your images perfectly fit within the document’s flow.
Table Manipulation
Working with tables in Google Docs via the API enables you to dynamically generate content based on data. This includes creating tables, adding or removing rows and columns, and modifying table properties.
Creating a Table
The initial step often involves creating a table in your document. Here’s an example of how to create a table with two rows and three columns:
const documentId = 'YOUR_DOCUMENT_ID'; // Replace with your actual document ID
const requests = [
  {
    insertTable: {
      rows: 2,
      columns: 3,
      location: {
        index: 1,
      },
    },
  },
];

const fetchOptions = {
  method: 'POST',
  headers: {
    Authorization: `Bearer ${YOUR_OAUTH2_TOKEN}`, // Replace with your actual OAuth token
    'Content-Type': 'application/json',
  },
  body: JSON.stringify({requests}),
};

fetch(`https://docs.googleapis.com/v1/documents/${documentId}:batchUpdate`, fetchOptions)
  .then(response => response.json())
  .then(result => console.log(result))
  .catch(error => console.error('Error: ', error));
Adding Rows to a Table
To add a row to an existing table:
const documentId = 'YOUR_DOCUMENT_ID'; // Replace with your actual document ID
const requests = [
  {
    insertTableRow: {
      tableCellLocation: {
        tableStartLocation: {
          index: 28, // Replace with the index where your table starts
        },
        rowIndex: 1, // Add row after the first row
      },
      insertBelow: true,
    },
  },
];;

const fetchOptions = {
  method: 'POST',
  headers: {
    Authorization: `Bearer ${YOUR_OAUTH2_TOKEN}`, // Replace with your actual OAuth token
    'Content-Type': 'application/json',
  },
  body: JSON.stringify({requests}),
};

fetch(`https://docs.googleapis.com/v1/documents/${documentId}:batchUpdate`, fetchOptions)
  .then(response => response.json())
  .then(result => console.log(result))
  .catch(error => console.error('Error: ', error));
Removing a Row from a Table
To remove a specific row from a table:
const documentId = 'YOUR_DOCUMENT_ID'; // Replace with your actual document ID
const requests = [
  {
    deleteTableRow: {
      tableCellLocation: {
        tableStartLocation: {
          index: 28, // Replace with the index where your table starts
        },
        rowIndex: 0, // Row index to delete, 0 for the first row
      },
    },
  },
];


const fetchOptions = {
  method: 'POST',
  headers: {
    Authorization: `Bearer ${YOUR_OAUTH2_TOKEN}`, // Replace with your actual OAuth token
    'Content-Type': 'application/json',
  },
  body: JSON.stringify({requests}),
};

fetch(`https://docs.googleapis.com/v1/documents/${documentId}:batchUpdate`, fetchOptions)
  .then(response => response.json())
  .then(result => console.log(result))
  .catch(error => console.error('Error: ', error));
Adding a Column to a Table
To add a column to an existing table:
const documentId = 'YOUR_DOCUMENT_ID'; // Replace with your actual document ID
const requests = [
  {
    insertTableColumn: {
      tableCellLocation: {
        tableStartLocation: {
          index: 28, // Replace with the index where your table starts
        },
        columnIndex: 0, // Add column after the first column
      },
      insertRight: true,
    },
  },
];

const fetchOptions = {
  method: 'POST',
  headers: {
    Authorization: `Bearer ${YOUR_OAUTH2_TOKEN}`, // Replace with your actual OAuth token
    'Content-Type': 'application/json',
  },
  body: JSON.stringify({requests}),
};

fetch(`https://docs.googleapis.com/v1/documents/${documentId}:batchUpdate`, fetchOptions)
  .then(response => response.json())
  .then(result => console.log(result))
  .catch(error => console.error('Error: ', error));
Removing a Column from a Table
To remove a specific column from a table:
const documentId = 'YOUR_DOCUMENT_ID'; // Replace with your actual document ID
const requests = [
  {
    deleteTableColumn: {
      tableCellLocation: {
        tableStartLocation: {
          index: 28, // Replace with the index where your table starts
        },
        columnIndex: 0, // Column index to delete, 0 for the first column
      },
    },
  },
];

const fetchOptions = {
  method: 'POST',
  headers: {
    Authorization: `Bearer ${YOUR_OAUTH2_TOKEN}`, // Replace with your actual OAuth token
    'Content-Type': 'application/json',
  },
  body: JSON.stringify({requests}),
};

fetch(`https://docs.googleapis.com/v1/documents/${documentId}:batchUpdate`, fetchOptions)
  .then(response => response.json())
  .then(result => console.log(result))
  .catch(error => console.error('Error: ', error));
Table manipulation through the Google Docs API is a powerful feature that enables dynamic content creation and data presentation. By utilizing these API calls, developers can programmatically adjust table structures, tailor content to specific needs, and enhance the overall document appearance and functionality.
Advanced Text Styling and Formatting
Text styling and formatting are essential for emphasizing parts of your document, organizing information, and improving readability. The Google Docs API offers a comprehensive set of features for this purpose.
Setting Font Type and Size
To change the font type and size for a specific text range:
const documentId = 'YOUR_DOCUMENT_ID'; // Replace with your actual document ID
const requests = [
  {
    updateTextStyle: {
      range: {
        startIndex: 30, // Start of the text range
        endIndex: 45, // End of the text range
      },
      textStyle: {
        fontFamily: 'Arial',
        fontSize: {
          magnitude: 14,
          unit: 'PT'
        }
      },
      fields: 'fontFamily,fontSize'
    }
  }
];

const fetchOptions = {
  method: 'POST',
  headers: {
    Authorization: `Bearer ${YOUR_OAUTH2_TOKEN}`, // Replace with your actual OAuth2 token
    'Content-Type': 'application/json',
  },
  body: JSON.stringify({requests}),
};

fetch(`https://docs.googleapis.com/v1/documents/${documentId}:batchUpdate`, fetchOptions)
  .then(response => response.json())
  .then(result => console.log(result))
  .catch(error => console.error('Error: ', error));
Changing Text and Background Color
To modify the color of text and its background within a range:
const requests = [
  {
    updateTextStyle: {
      range: {
        startIndex: 50,
        endIndex: 65,
      },
      textStyle: {
        foregroundColor: {
          color: {
            rgbColor: {red: 0.0, green: 0.0, blue: 0.0} // Black text
          }
        },
        backgroundColor: {
          color: {
            rgbColor: {red: 1.0, green: 1.0, blue: 0.0} // Yellow background
          }
        }
      },
      fields: 'foregroundColor,backgroundColor'
    }
  }
];

const fetchOptions = {
  method: 'POST',
  headers: {
    Authorization: `Bearer ${YOUR_OAUTH2_TOKEN}`, // Replace with your actual OAuth2 token
    'Content-Type': 'application/json',
  },
  body: JSON.stringify({requests}),
};

fetch(`https://docs.googleapis.com/v1/documents/${documentId}:batchUpdate`, fetchOptions)
  .then(response => response.json())
  .then(result => console.log(result))
  .catch(error => console.error('Error: ', error));
These examples illustrate how to utilize the Google Docs API for advanced text styling, including changing fonts, sizes, and colors. By adjusting the startIndex and endIndex values, you can apply these styles to any text segment in your document.